
Upgrading from version 2.1 and later
To upgrade to the latest Paragon-neo releases, installation of specific intermediate releases may be required, see table below detailing the upgrade path.
To upgrade from a From Release to a To Release the intermediate releases shown in the intersecting cell must be installed in the order shown. E.g. to upgrade from R4 to R8.1, upgrade to R5, then R7, then R8.1. If "Direct" is shown then no intermediate release is required between the versions.
Downgrading is possible however specific steps may be required, therefore this should only be performed with the approval of Calnex Solutions.
From Release | To Release | |
R8.1 | R7 | |
R8 🠚 | Direct | N/A |
R7 🠚 | Direct | N/A |
R6 🠚 | 🠚 R7 🠚 | Direct |
R5 🠚 | 🠚 R7 🠚 | Direct |
R4 🠚 | 🠚 R5 🠚 R7 🠚 | 🠚 R5 🠚 |
R2.1 🠚 | 🠚 R4 🠚 R5 🠚 R7 🠚 | 🠚 R4 🠚 R5 🠚 |
From version 2.1, the Paragon-neo software is delivered as a tar file (*.tar). Download this file and save it to a location on your PC.
Before upgrading the instrument, you must first stop all generation and capture.
Follow the steps below to upgrade:
Click System in the menus on the top right of the UI
Click Setup in the left hand menu bar
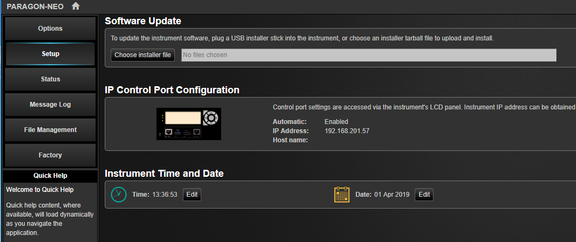
The UI should look something like:
Click Choose installer file to select the tar file that you saved earlier
The instrument will now begin the upgrade process. Note that this will take a while (maybe as much as an hour). Do not power off while the upgrade is in process.
Upgrading from versions 1.0 or 2.0
The Paragon-neo software may either be delivered as a tar file (*.tar) or as an ISO (*.iso) file (disk image). Upgrading using tar file is preferred but if you would rather use the ISO file, see the instructions below for versions prior to 1.0.
Download the tar file and save it to a location on your PC.
Before upgrading the instrument, you must first stop all generation and capture and then re-boot the instrument.
Once the instrument has re-booted, follow the steps below to upgrade:
Click System in the menus on the top right of the UI
Click Setup in the left hand menu bar
The UI should look something like:
Click Choose installer file to select the tar file that you saved earlier
The instrument will now begin the upgrade process. Note that this will take a while (maybe as much as an hour). Do not power off while the upgrade is in process.
If you do not re-boot prior to attempting the upgrade, the upgrade may fail. In this case, the upgrade process will complete quickly and the version number will remain unchanged. In this situation, you should re-boot and then re-try the upgrade.
Upgrading from versions prior to 1.0
Write the ISO image onto a USB stick
The Paragon-neo software is delivered as an ISO (disk image). To upgrade the instrument, this ISO file must be written to a USB stick as an image. To do this, you will need to install an application capable of writing ISO images to USB. One such application is Win32DiskImager. This can be downloaded from http://sourceforge.net/projects/win32diskimager/
There are typically two .iso files released for each software version. The correct one for upgrading hardware using this process will have Installer in its filename. The LiveCD version will not work.
Once you have your disk image application installed, run it. You should then load the Paragon-neo ISO file. Using Win32DiskImager:
Select the folder icon next to the “Image File” field
In the “Select a disk image” dialog, select the *.* file filter
Locate and open the Paragon-neo software ISO file
Select “Write”
The ISO should then be written to your USB stick:
Perform the Upgrade
Your instrument should be powered on BEFORE you insert the USB stick. In addition, it is not possible to upgrade unless the box is idle - make sure to stop all generation and capture.
Click System in the menus on the top right of the UI
Click Setup in the left hand menu bar
The UI should look something like:
Insert the USB stick
Click Choose installer file to select the file from the USB stick
The instrument will now begin the upgrade process. Note that this will take a while (maybe as much as an hour). Do not power off while the upgrade is in process.